


FAQs: WeatherLink.com
General
Yes. WeatherLink.com is a website accessible via any major web browser (Chrome, Safari, Firefox, also IE and Edge).
Yes. You can create your WeatherLink.com Account without even owning a Davis weather station and start browsing weather conditions (under the 'Map' tab) from all the WeatherLink members publicly sharing their data.
Both platforms allow you to view basic weather information but both also have very unique features.
WeatherLink.com
Features available to you on WeatherLink.com are: Bulletin, Chart, Data, Map and Mobilize
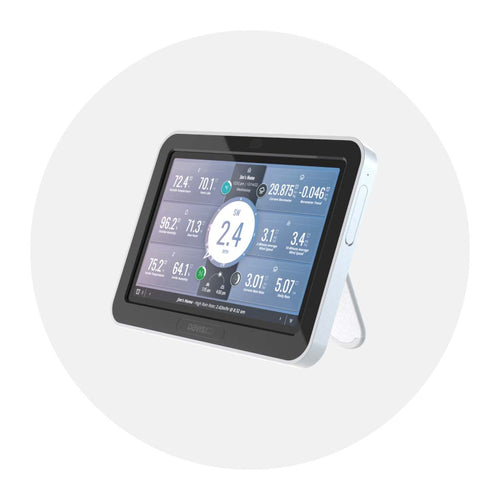
A. Bulletin
- New Features: Wind Rose, Local Forecast, Sunrise/Sunset, Moon Phase
- Key Features: Temperature, Humidity, Barometer, Wind Speed, Wind Direction, Current Rain, Total Rain, Solar Radiation, Ultra Violet Levels
- Ability to customize the bulletin: Display only the sensors you want, change the size and location of the sensor displays
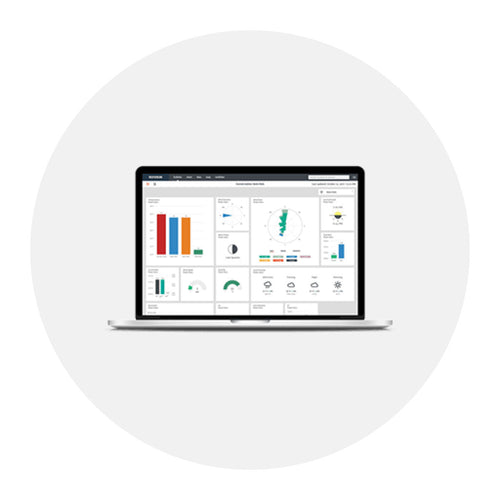
B. Chart
- Access and visualize your historical data
- Customize your Y Axis
- Customize your display: color of sensor's graph line, switch between line and bar visualization
- Visualize several sensor readings in one graph
- Access and chart data of stations shared with you
C. Data
- Access and view your historical data in a table format
- Customize youor view of sensoors, browse only the data you want
- Export your data
- Access and view data of stations shared with you
D. Map
- Track public stations from all around the world (over 26,000 members)
- View live data (current conditions) from any public station
- Access the Bulletin of any public station for even more data
E. Mobilize
- Track all the views you've created in yur Mobilize App and access advanced agriculture-focused reports for Frost, Weather, Crop and Irrigation
WeatherLink Mobile App
Features available to you on the WeatherLink Mobile App include:
- Station List: View current rain, temperature and humidity, wind and conditions for all of your stations and the public stations that you follow
- Station Details Screen: Dive deep into your station data, including hourly and 7-day forecasting, temperature and humidity, rain, wind, barometric pressure, UV index and solar radiation
- Charts for forecast, rain, barometer, UV index and solar radiation
- Solar Energy Calculator: estimates the solar energy produced with a 250 W solar panel and how many 60 W light bulbs it could run
Features available to you on WeatherLink.com are: Bulletin, Chart, Data, Map and Mobile
A. Bulletin
- New Features: Wind Rose, Local Forecast, Sunrise/Sunset, Moon Phase
- Key Features: Temperature, Humidity, Barometer, Wind Speed, Wind Direction, Current Rain, Total Rain, Solar Radiation, Ultra Violet Levels
- Ability to customize the bulletin: Display only the sensors you want, change the size and location of the sensor displays
B. Chart (Paid Pro Tier)
- Access and visualize your hisstorical data
- Customize your Y Axis
- Customize your display: color of sensor's graph line, switch between line and bar visualization
- Visualize several sensor readings in one graph
- Access and chart data of station shared with you
C. Data (Paid Pro Tier)
- Access and view your historical data in a table format
- Customize your view of sensors, browse only the data you want
- Export your data
- Access and view data of stations shared with you
D. Map
- Track public stations from all around the world (over 26,000members)
- View live data (current conditions) from any public station
- Access the Bulletin of any public station for even more data
E. Mobilize (Paid Pro Tier)
- Track all the views you've created in your Mobilize App and access advanced agriculture-focused reports for Frost, Weather, Crop and Irrigation
Yes. Bulletin and Map features are available to you for FREE.
To access Chart, Data and Mobilize features, upgrade your account to Pro Tier for only $3.95/mo by clicking ‘UPGRADE PLAN’ button in the User Account dropdown menu.
If you are an existing or a new Vantage Connect or EnviroMonitor user, you will get the Pro Tier access as a part of your regular monthly service fee.
If you are an existing WeatherLink.com user with an active WeatherLink Network Annual Subscription (WeatherLink.com 1.0 “blue page” subscription), you will be prorated for the remaining duration of your subscription with an upgraded Pro Tier full of advanced features (Data, Chart, Mobilize).
If you received a password reset email for WeatherLink.com and did not request a password reset, please disregard the email. You do not need to inform Davis Instruments Technical Support that you did not request a password reset. If you disregard the email, your password will not be changed and your WeatherLink.com account will not be affected.
Bulletin and Map features are available to you for FREE. You can access advanced features (Chart, Data, Mobilize) by upgrading your account to Pro Tier plan for only $3.95/mo. Simply upgrade your tier by clicking on the 'UPGRADE PLAN' button in your user account dropdown menu.
WeatherLink IP and USB-or-Serial Data Logger: You can set your reading interval to 1 min, 5 min, 10 min, 15 min, 30 min, 1 hour, or 2 hours. This data is uploaded to our server every hour (Example: WeatherLink IP with 15-min interval will send up data every hour with 4 sets of readings. While a 30-min interval will be sent every hour with 2 sets of readings.) You can set the interval in your WeatherLink PC Software.
Vantage Connect and EnviroMonitor: Your data upload interval depends on your subscription plan -- 5 min, 15 min, or 60 min.
Video Instructions
Check out our YouTube video that steps you through the process of updating your firmware.
Written Instructions
- Download the firmware from our Firmware Support Page.
- Launch the WeatherLinkIP_Firmware_vXXX.exe file.
- The Firmware Updater dialogue window will appear.
- Select Local Device ID (DID) and click the Find button. This will populate the Local Device ID field with your DID #. If you know the IP address for your data logger, you can enter it into the remote IP address field instead.
- Once your device is found, click the Start button. A Firmware Information Dialogue box will appear advising you of your current Firmware version. Click OK to proceed or Cancel to stop the update.
- Once you click START, the progress bar will begin to show the update progressing. Once complete another dialogue box will appear advising Firmware Update Succesful! Simply click OK and you're all Done.
**This firmware installer will only work on the latest Mac OS (Catalina)**
The mac version of the Weatherlink IP firmware can be downloaded HERE
**This firmware installer will only work on the latest Mac OS (Catalina)**
The Mac version of the WeatherLink IP firmware can be downloaded HERE
Extract the contents of the zip file (WLIPupdater115.zip) then double click on "WLIPupdate115.dmg"

Double click on "UpdateWLIP"

It will run a scrip then ask for your password

As you type your mac password, it will now shows any * or characters, just continue to type your password then hit enter.
There are various reasons to reinitialize your data logger. If you need to do so, here's how:
- Remove the batteries and power cable from your console or Envoy.
- Remove the data logger.
- Wait 10 seconds.
- Replace the data logger.
- Replace the power cable.
- Replace the batteries.
Jan 1, 2020 we discovered a bug in the WeatherLinkIP datalogger that will prevent it from keeping its time properly synched with Davis servers and cause it to stop uploading historical archive records. You may have noticed that when downloading archive records into your PC software or looking at archive records on weatherlink.com that they are not entirely up to date. This firmware patch will fix that and ensure your weather station clock stays accurate and in synch.
Everyone using a WeatherLinkIP datalogger (p/n 6555) with their Davis weather station will need this critical update.
This critical firmware update can be found HERE.
How to update instructions can be found HERE.
WeatherLink.com is a cloud-based solution, so you can access it from any internet-connected device. It has all the popular features from the WeatherLink PC Software and more are planned to be developed in the near future. It is our goal to keep on continually expanding and improving WeatherLink.com features.
No. Envoy8X was designed to communicate with a specialized data transfer utility, which is not capable of sending data to the WeatherLink Cloud.
Configuration
You can view your data online:
- A. in your web browser at WeatherLink.com
- B. on your smartphone in WeatherLink Mobile App
To view your data online, you first need to send the data to the Davis Cloud with the use of a Data Logger (WeatherLink IP plugged into your router or Standard USB or Serial Data Logger plugged into your computer) or EnviroMonitor Gateway cellular-based solution. You can create your WeatherLink Account here.
If your station is in a remote area with a with a good cellular connection, you can use EnviroMonitor Gateway. Learn more here.
Simply visit https://www.weatherlink.com, type your email into the field, click 'Sign Up' button and follow the instructions.
No. Once you create a username it cannot be changed.
Yes. One WeatherLink account can have several devices registered.
Note: Each device can be registered only under one account.
As many as you want. You can register unlimited amount of devices and have access to their current conditions (Bulletin).
With the Pro Tier plan, you are able to access and use advanced features for 3 of your devices.
Note: Vantage Connect and EnviroMonitor owners are automatically on Pro Tier plan.
To reset your password, click on the password link in ’Forgot username or password?’ section located on the sign-in page. After entering your email and clicking ‘next’, we will send you a link to reset your password to the email address you provided.
If you want to retrieve your username, click on the username link in the ’Forgot username or password?’ section located on the sign-in page. After entering your email and clicking next, we will send your username to the email address you provided.
Once you have purchased a Pro (or Pro+) upgrade for your account you can apply it to a specific station.
- Select the station from the station dropdown in the top right.
- Once the station is selected, click on the gear icon in the top center near the word Basic. Here you can set this station to the Pro (or Pro+) tier.

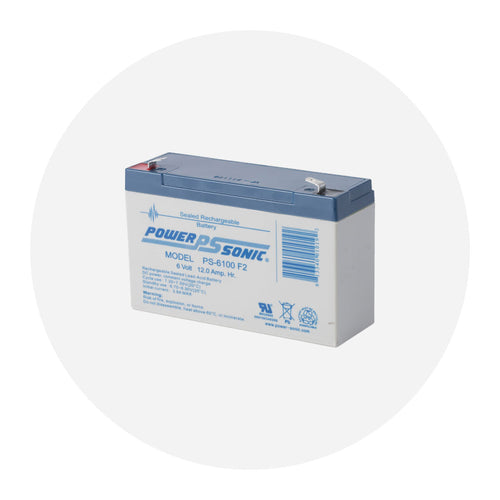
1. WeatherLink Live (#6100)
WeatherLink Live receives data from your Vantage Pro2 or Vantage Vue sensor suites, or from sensor transmitters. It then automatically uploads the data via Wi-Fi to the cloud. You can have up to 8 different transmitting stations, all sending data to one WeatherLink Live. The transmitting stations can be any combination of sensor suites or sensor transmitters.
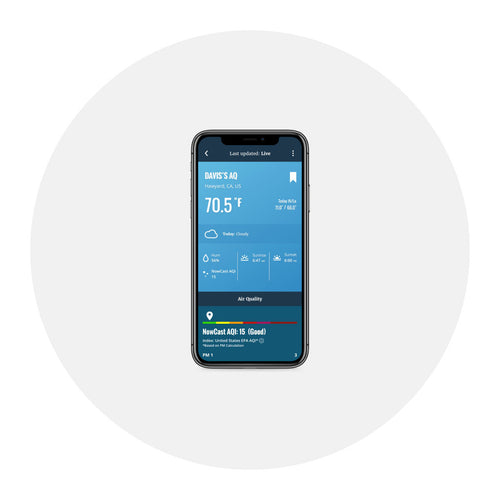
It's simple to set up using your smartphone. Within minutes, you can view your current conditions live on your free WeatherLink.com dashboard as well as on the WeatherLink mobile app.
On top of that, you can upgrade to Pro for only $3.95/month, and get access to and storage of your historical (archive) data. You can visualize, graph, and compare all your sensor data as well export the data in .csv format.
2. WeatherLink USB Data Logger (#6510USB)
If you don’t have access to Wi-Fi router, hub, or extender, we recommend using the WeatherLink USB Data Logger and free WeatherLink Computer Software (Mac version), which can be downloaded from WeatherLink.com.
To view your live data on WeatherLink.com and to store your data in the WeatherLink Cloud, you'll need to keep your computer and your WeatherLink Computer Software running 24/7.
It should be as simple as connecting on TCP port 22222 and sending serial commands. You do need to ensure you use a raw TCP connection with no higher level protocol. It will momentarily refuse the connection if it is actively uploading to WeatherLink.com that moment, but if you retry in a few seconds it should work. Please note that in order to allow the IP logger to send to WeatherLink.com, you must release the TCP socket for about 5 seconds once per minute for the current conditions (loop packet) to be sent and about 60 seconds once per hour for the archive records to be sent up.
Setting the IP address of the Weatherlink IP data logger to "Static" means it's limited to one specific address. When changes are made to the network, sometimes the IP data logger won't connect because it's stuck on the old "Static" IP that no longer exists. To get around this there are some instructions on spoofing the IP to an address you want it to be.
Lets try FORCING it to another IP.
NOTE:192.168.xxx.xxx= the IP address you want001D0A002325= the Device ID (DID)
Click Start, click All Programs, and then click Accessories.Right-click Command prompt, and then click Run as administrator.If the User Account Control dialog box appears, confirm that the action it displays is what you want, and then click Continue.
arp -s 192.168.xxx.xxx 00-1D-0A-00-23-25(That is arp{space}-s{space}192.168.xxx.xxx{space}00-1D-0A-00-23-25)Do you see any messages? You should not typically.
ThenPing 192.168.xxx.xxxYou should see 1 fail, and 3 successful pings ThenPing 192.168.xxx.xxxYou should see 4 successful pings.
This will confirm that the IP took
Data
Yes. WeatherLink.com 2.0 and the WeatherLink Mobile App 2.0 are designed to work together.
Once you have installed your data collection device and downloaded the WeatherLink Computer Software, you'll need to set up uploads. Here's how to do it:
- On your WeatherLink.com page, click the green Add Devices button at the top of the page. (Choose Data Logger for WeatherLink USB or WeatherLink Serial.)
- Click Install and follow the prompts to set up your device. When done, your station’s Device ID and Key will be displayed. Make a note of these.
- In the WeatherLink Computer Software, open WeatherLink Network from the Setup Menu. Enter the Device ID and Key.
- If you have a Serial or USB data logger, don’t forget to leave your computer on with the software running 24/7 for continuous uploads.
- Be sure to get the WeatherLink mobile app so you can see your data wherever you are. Search the iOS and Android stores for Davis WeatherLink.
Yes. You can make your weather station data private and hidden from the map of WeatherLink Network (publicly-shared) weather stations by choosing the 'Private' flag in the device settings section of your WeatherLink.com Account (wrench icon). Please, allow up to one hour for the system to recognize the change.
Your Data Logger stores up to 2560 archive records (one 52-byte record per archive interval) for later transfer to your computer. The time period that is sotred on your Data Logger depends on what archive interval you have set.
| Arhive Interval | Storage Capacity |
|---|---|
| 1 Minute | 42 hours |
| 5 Minute | 8 days |
| 10 Minute | 17 days |
| 15 Minute | 26 days |
| 30 Minute | 53 days |
| 60 Minute | 106 days |
| 120 Minute | 213 days |
Yes. The "Web Download" feature in your WeatherLink Computer Software allows you to download your data from the WeatherLink Cloud to your computer. Simply click on Setup > Communications Port, Select TCP/IP, then "Web Download", type in the Device ID (001D0A******) of your station and your password for weatherlink.com. Then click File > Download in your software.
(This feature will not work with a Weatherlink Live device)
"Web Download" will give you 4x the amount of data your Data Logger (USB, Serial, WL IP) can store.
You can download all your data as long as you do it periodically.
Please check the table below to determine how often you should download your data from the cloud to your computer to keep it all.
1 Minute Archive Interval . . . . . . . . . . . . . . . . . . . . . 7 days
5 Minute Archive Interval . . . . . . . . . . . . . . . . . . . . . 32 days
10 Minute Archive Interval . . . . . . . . . . . . . . . . . . . . 68 days
15 Minute Archive Interval . . . . . . . . . . . . . . . . . . . . 104 days
30 Minute Archive Interval . . . . . . . . . . . . . . . . . . . . 212 days
60 Minute Archive Interval . . . . . . . . . . . . . . . . . . . . 424 days
120 Minute Archive Interval . . . . . . . . . . . . . . . . . . . 852 days
WeatherLink.com
Option 1: Bulletin and Summary
If your weather station is set for public sharing (Device > Device Info > WeatherLink Network > Public), you can share the URL to your current conditions (Bulletin) with your family, friends and neighbors. As long as they are registered with a WeatherLink.com account, they can view your data.

Option 2: Shareable URL
The Station URL gives you the ability to share your station data with anyone without requiring that person to log into WeatherLink.com and create an account.

- Log in to WeatherLink
- Access the Device Info screen by clicking the wrench in the right sidebar, under the username and account picture.
- Select the statin you are interested in in the right sidebar.
- Under the device option, selecct Station URL
- Click Preview to see each of the three size.
- Click Copy Link to copy and share the unique Station URL
To share a more detailed view of your weather station, including the customizable weather bulletin, ask the person to create a WeatherLink.com account and search for your weather station name on the map.
WeatherLink Mobile App
Have your family, friends or neighbors download the app and create a WeatherLink account. You can either share a link to your weather station, or they can search for your station name or location on the map. With a simple click on the 'Add Station' button, your weather station will be added to their list of stations on their home screen.
Sharing your weather station's current conditions publicly as a member of WeatherLink Network is free of charge, as is viewing current conditions from other publicly-shared stations on the map.
You will, however, have to upgrade your account to Pro status in order to Share your historical data or to view someone else's historical data.
A section in your 'Manage Devices' page called 'Uploads' allows you to choose from these 3rd-party weather sites. You just need to select those you want to upload to with the use of the checkbox and type in your credentials.
Note: GLOBE Uploads are only supported on WeatherLInk Data Loggers, not the WeatherLink Live or WeatherLink Console.
Yes, we have many options.
Current Conditions API
We have a current conditions API. Simply register online at WeatherLink.com. by logging in to your account on Weatherlink.com; clicking the human (account information) icon on the right side of your screen then clicking the "generate Token" link in the bottom left. See Figure 1 below
Archive Records API
To download historical/archive records from our cloud serve see page 36 (Web Download) of this document for details on how to download archive records from our cloud service.
Embedded Widget
You can generate a URL that will link to a current conditions widget (3 possible sizes) by selecting the proper weather station in the station drop down in the upper right. Once the station in question is displayed click the wrench icon and, under Device, choose either Station Embed or Station URL to view the widget and get its URL and/or HTML embeddable link. See Figure 2 below.

